Checking ink occupancy is certainly not a wasted effort. Excessive ink coverage in printing can lead to longer drying times, smudges, colour bleeding, and loss of details in the design. These issues can slow down production, compromise print quality, and incur additional costs. It's important to optimise ink coverage to prevent these problems and produce high-quality print materials.
Step 1
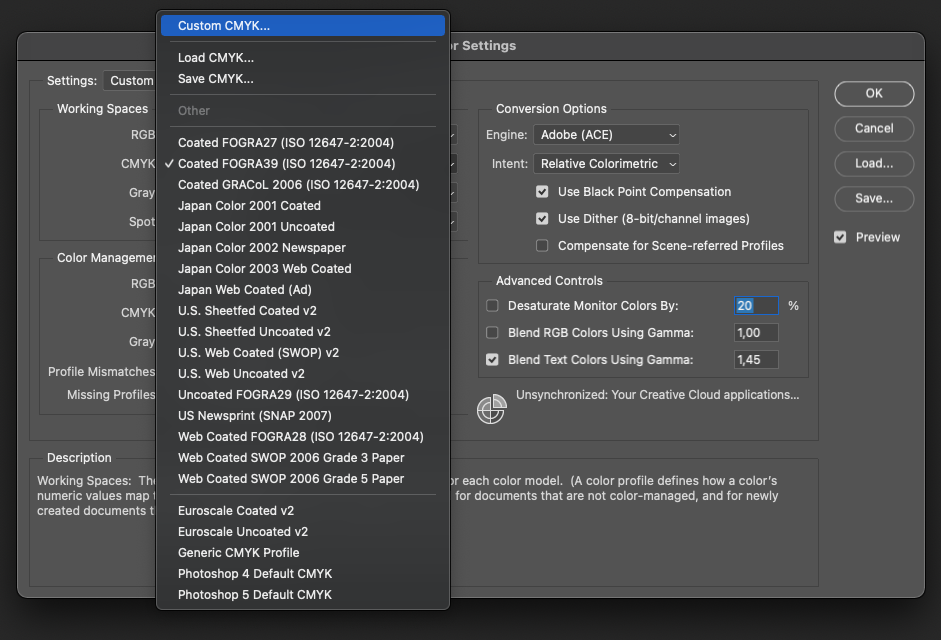
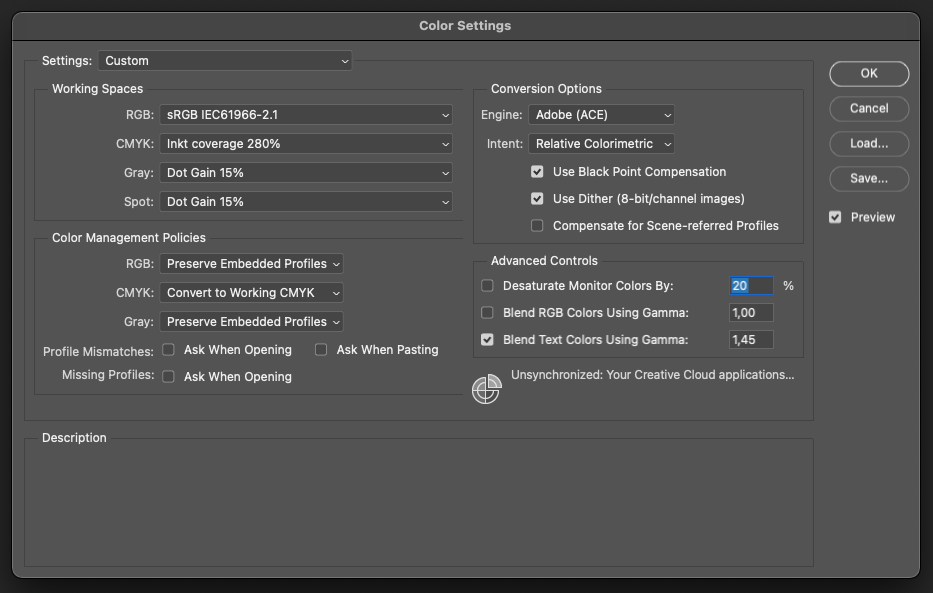
Open the photo in Adobe Photoshop. Then go to Edit -> Colour Settings. Under Working Spaces, create a new profile for CMYK. (Custom CMYK…)
Step 2
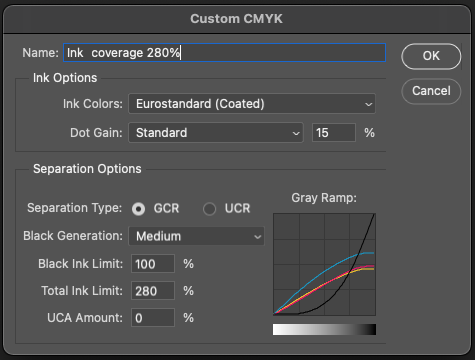
Adjust the profile according to the profile details provided below. Verify everything is as desired and then click OK to save the settings.
Step 3
Ensure the new profile is being used under Working Spaces -> CMYK and click OK to save the settings.
Step 4
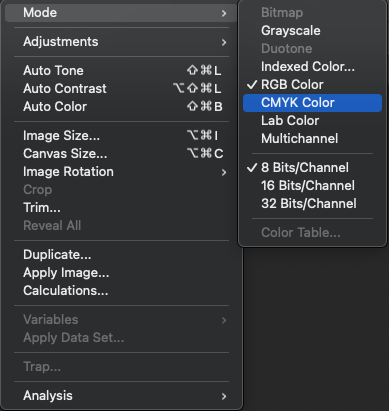
Now, change the colour mode to CMYK. This can be done under Image -> Mode, then select CMYK.
Step 5
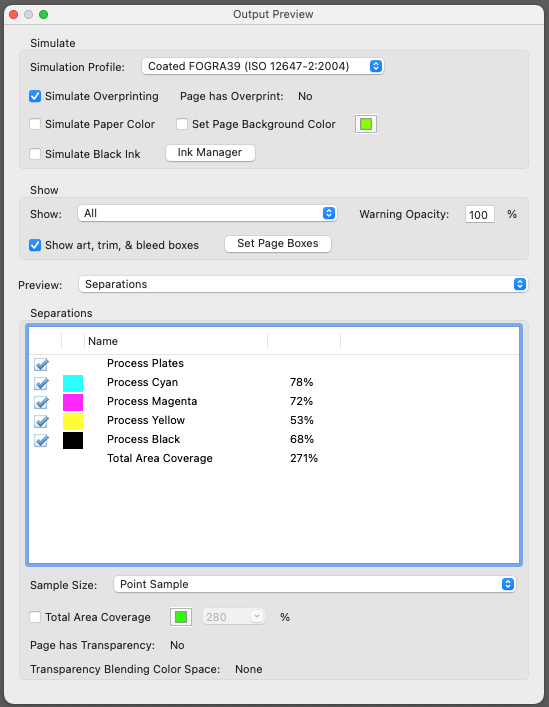
Finally, export the file to PDF and verify that the process has been successful. When you open the PDF file with Adobe Acrobat Pro, you can use Print Production -> Output Preview in your tools to check the ink coverage. Hover your cursor over the desired area to examine a specific region for ink coverage.